Proper Jump Starter Winter Storage Guide
Storing your jump starter during winter can seem tricky, especially if you’re new to car care. Many folks wonder about battery health and cold weather’s impact. Don’t worry, it’s easier than you think! This guide simplifies the process, ensuring your jump starter is ready when you need it. We’ll explore exactly how to store jump starter in winter, keeping things simple and straightforward. So, get ready to keep your jump starter in peak condition for any season. Let’s begin!
Prepare Your Jump Starter for Winter Storage
Getting your jump starter ready for winter is key. This initial step sets the stage for its longevity and performance. Many people overlook this, but proper preparation can avoid issues down the road. It ensures your device will function reliably when the need arises. Think of it as a pre-winter check-up for your essential car gear. This proactive approach helps avoid frustrating surprises during colder months. The goal is to set the jump starter up for success.
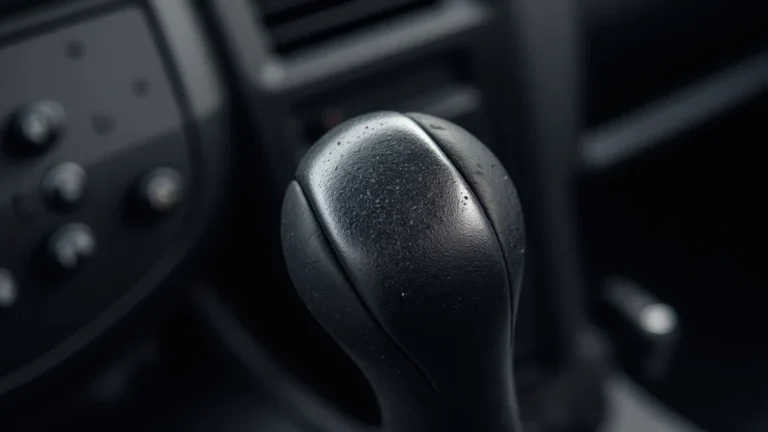
Cleaning and Inspection
Before putting your jump starter away, give it a good clean. Dirt and grime can impact its performance. Use a soft, dry cloth to wipe down the casing and the charging ports. Avoid using harsh chemicals or water. Carefully examine the cables and clamps for any signs of damage like cracks or frayed wires. These could cause safety hazards or prevent the jump starter from working. A quick inspection can prevent bigger problems later. Ensure the clamps are clean and free of corrosion. Proper cleaning and inspection are essential steps to keep your jump starter in working order.
- Visual Inspection: Check the entire unit for physical damage. Look for cracks, bulges, or leaks. Inspect the cables for cuts or frays. If anything looks off, do not use the jump starter.
- Clamp Check: Make sure the clamps are clean and in good condition. Clean any corrosion with a wire brush or a baking soda and water solution. Proper clamp function ensures a good connection.
- Port Cleaning: Use a cotton swab to clean charging and USB ports. Remove any dust or debris that could interfere with charging. Proper port care helps to maintain the jump starter.
Charging and Battery Health
A fully charged jump starter is a happy jump starter. Before storing, charge it to its maximum capacity. This prevents the battery from degrading during the storage period. Refer to your jump starter’s manual for specific charging instructions. Use the charger that came with the device, and charge it in a well-ventilated area. Consider the type of battery your jump starter uses, whether it’s lithium-ion, lead-acid, or another type. Knowing the battery type informs the best storage practices. Regularly topping up the charge is a good practice.
- Full Charge: Before storing, fully charge your jump starter. This ensures the battery is at its peak when you need it.
- Check Battery Type: Identify the battery type. This will influence the best storage practices and charging frequency.
- Use the Right Charger: Always use the charger supplied with your jump starter. This ensures the device is charged correctly.
- Avoid Overcharging: Do not leave the jump starter on the charger for extended periods once it’s full. Overcharging can damage the battery.
Selecting the Right Storage Environment
The environment matters when storing your jump starter. Temperature and humidity play key roles in its lifespan. The best place is a cool, dry area. Garages and basements often work well. Avoid extreme temperatures. Heat can damage the battery and reduce its life. Cold is generally better than heat, but extreme cold might affect performance. Humidity can lead to corrosion. Ensure the storage area is away from direct sunlight. Consider the long-term impact of your storage spot.
- Temperature: Store in a cool place, ideally between 32°F (0°C) and 77°F (25°C). Avoid extreme heat or cold.
- Humidity: Keep the jump starter away from damp environments. High humidity can cause corrosion.
- Ventilation: Ensure good air circulation. This helps prevent moisture buildup.
- Sunlight: Avoid direct sunlight. UV rays can degrade plastic components.
Ideal Winter Conditions for Jump Starter Storage
Winter presents specific challenges for jump starter storage. Cold temperatures and potential fluctuations are major factors. Understanding these elements can help protect your device. This understanding helps ensure that the jump starter is in top condition when you need it most. Winter requires a different strategy. The goal is to provide a safe and stable environment for your jump starter during the winter. This will extend its working life and make you ready.
According to the Consumer Reports, the ideal storage conditions involves a controlled environment, such as a garage or a basement, which are often cooler and less humid than the outdoors. This helps to prevent battery degradation and corrosion.
Temperature Considerations
Cold weather impacts battery performance. Batteries lose some of their capacity in low temperatures. While jump starters can handle cold, extreme cold can decrease their efficiency. Ideally, a consistent temperature above freezing is best. Avoid storing the jump starter in places that experience extreme temperature swings. These swings can damage battery components. Protect your device from rapid changes. This helps to preserve its functionality. Think about locations that provide relative thermal stability.
- Stable Temperature: A stable temperature is best. Avoid locations with big temperature swings.
- Above Freezing: Temperatures above freezing are recommended. This protects the battery.
- Avoid Direct Heat: Do not store near heat sources like furnaces or heaters.
- Monitor the Environment: Keep an eye on the storage environment. Make sure it stays within the recommended temperature range.
Humidity and Moisture Management
Humidity is another key issue in winter. Moisture can lead to corrosion, especially on metal components like the clamps. High humidity also accelerates battery degradation. Ensure the storage area is dry and well-ventilated. Using a dehumidifier can help control humidity. If storing the jump starter in a damp area, consider placing it in a sealed container with a desiccant pack. This absorbs moisture and protects the device. The goal is to eliminate potential for corrosion or other damage. Maintaining low humidity is key.
- Dry Environment: Store the jump starter in a dry place. This prevents corrosion.
- Dehumidifier: If necessary, use a dehumidifier. This helps to keep humidity levels down.
- Sealed Container: For extra protection, store the jump starter in a sealed container with a desiccant pack.
- Regular Checks: Occasionally inspect the jump starter for any signs of moisture damage or corrosion.
Protecting the Jump Starter from Elements
Other elements can damage your jump starter during winter. Keep it away from dust, dirt, and chemicals. Dust can clog ports and vents, impacting performance. Dirt can introduce unwanted debris into the device. Chemicals can cause corrosion and harm the components. A protective case or cover can offer extra protection. Choose a non-reactive material that will not affect the jump starter. This helps to safeguard it from unexpected exposure. Remember that extra layers of protection are good.
- Protective Case: Consider a protective case. This can shield against dust and moisture.
- Away from Chemicals: Store away from chemicals like cleaning supplies or automotive fluids.
- Clean Storage: Keep the storage area clean. This reduces the risk of dust and dirt accumulating on the device.
- Regular Cleaning: Clean the exterior of the jump starter regularly. This helps prevent buildup of grime.
Maintenance Schedule for Winter Storage
A maintenance schedule is the key to a reliable jump starter. Regular upkeep helps maintain the battery’s health and ensures its functionality. This proactive strategy ensures that your jump starter is ready when you need it. By setting up a maintenance schedule, you can catch any issues before they become problems. Simple steps can keep your jump starter in peak shape. Following the schedule will help increase the life of your device.
According to AAA, batteries lose a significant amount of charge in cold weather conditions. Regular maintenance prevents this issue and keeps the device ready to go.
Regular Charging Intervals
Even when stored, batteries lose their charge. Regular charging prevents deep discharge and extends battery life. Aim to recharge your jump starter every 1-3 months. This prevents it from depleting completely. Check the charge level before each recharge. If the charge drops significantly, it may indicate a battery issue. A consistent charging schedule will help maintain optimal battery health. Always follow the manufacturer’s charging instructions. Regular charging avoids potential problems.
- Charge Every 1-3 Months: Recharge the jump starter regularly, even when not in use.
- Check Charge Level: Verify the charge level before recharging. This allows for monitoring.
- Avoid Deep Discharge: Prevent the battery from fully draining, as this can cause damage.
- Follow Instructions: Always adhere to the charging instructions provided by the manufacturer.
Visual Inspections and Physical Checks
Regular visual inspections can reveal potential issues before they become major problems. Check the casing for any signs of damage like cracks or bulges. Examine the cables and clamps for fraying or corrosion. Look at the charging ports for any debris or blockages. These checks can prevent unexpected problems later. This strategy helps to identify any deterioration. Regular checks allow you to take action before the jump starter fails. A quick inspection can save you time and money.
- Inspect the Casing: Examine the casing for cracks, bulges, or leaks.
- Check Cables and Clamps: Look for fraying or corrosion on the cables and clamps.
- Inspect Charging Ports: Make sure the charging ports are free of debris.
- Assess Overall Condition: Note any signs of wear and tear, and address them promptly.
Documentation and Record Keeping
Keeping a record of your jump starter’s maintenance can be helpful. Note the dates of charging and inspections. Document any problems and solutions. This allows you to track its performance over time. This information can be useful for troubleshooting. It also helps to see when parts may need replacing. Accurate records provide a complete overview of your jump starter’s care. Maintain clear and concise documentation.
- Record Charging Dates: Document each charging session.
- Note Inspection Findings: Keep track of visual inspection results.
- Record Any Issues: Note any problems or repairs.
- Track Performance: Monitor the overall performance of the jump starter.
Common Mistakes to Avoid in Jump Starter Storage
Avoiding common storage mistakes can preserve your jump starter’s lifespan and performance. These errors can lead to battery degradation and performance issues. Recognizing these pitfalls can protect your device. Knowing what to avoid is as important as knowing what to do. These common issues can be easily sidestepped. By following the best practices, you can avoid a lot of headaches.
Research suggests that improper storage is a main cause of premature battery failure. Knowing and avoiding common mistakes can have a huge impact.
Ignoring the Battery Charge Level
One of the biggest mistakes is neglecting the battery charge level. Storing a jump starter with a low battery can lead to deep discharge. This can shorten the battery’s lifespan and reduce its capacity. Always make sure the battery is at a high charge before storage. Regular charging intervals are necessary. Don’t leave your jump starter with a low charge for extended periods. This simple practice helps you avoid costly replacements. Battery health depends on proper charging routines.
- Monitor Charge: Regularly check the battery level.
- Avoid Low Battery Storage: Never store the jump starter with a low charge.
- Charge Regularly: Follow the charging intervals recommended by the manufacturer.
- Prevent Deep Discharge: Prevent the battery from fully draining.
Storing in Extreme Temperatures
Exposing the jump starter to extreme temperatures is another common error. High heat can damage the battery and the device’s electronic components. Low temperatures may reduce performance, especially on startup. Avoid storage locations such as attics, direct sunlight, or near heating sources. Moderate temperature swings can degrade the battery over time. The goal is to provide a stable, temperature-controlled environment. Taking care of temperature-related concerns is essential.
- Avoid Heat: Do not store in hot places.
- Protect from Cold: Avoid freezing temperatures.
- Choose Stable Environment: Select a storage location with a consistent temperature.
- Monitor Temperature Swings: Try to prevent rapid changes.
Failing to Inspect and Clean
Neglecting to inspect and clean the jump starter is another mistake. Dirt, debris, and corrosion can affect performance and reduce the lifespan. Regular cleaning helps to remove dirt and grime. Inspection helps detect damage. Failing to maintain this routine increases the chances of problems. A little attention can prevent equipment failure. Take the time to ensure it will work. Cleaning can extend the life of your device.
- Regular Cleaning: Clean the exterior of the jump starter.
- Visual Inspections: Regularly check the cables, clamps, and casing.
- Remove Corrosion: Clean any corrosion with a suitable solution.
- Keep Ports Clean: Remove debris from charging ports.
Troubleshooting Jump Starter Issues After Storage
After a period of storage, you may encounter issues with your jump starter. Knowing how to troubleshoot these problems can save time and effort. Common issues can arise after winter storage. Many problems are easily solved with a few checks and adjustments. Having troubleshooting skills can help you get the jump starter ready. Let’s explore solutions for common post-storage issues.
Battery Not Holding a Charge
If your jump starter is not holding a charge, it is often a sign of a battery issue. The battery might have reached the end of its lifespan. Charging a jump starter that does not maintain charge is an issue. Check the charger and the charging port. Try a different charger. If the issue continues, the battery may need to be replaced. Ensure the charging process is correct. Battery health depends on proper maintenance.
- Check the Charger: Ensure the charger is working properly.
- Inspect Charging Port: Make sure the port is clean and functional.
- Battery Testing: Check the battery’s voltage to determine its condition.
- Consider Replacement: If the battery does not hold a charge, consider replacing it.
Clamps Not Making Good Contact
Problems with the clamps are another possible issue. Clamps that don’t make good contact won’t jump start a vehicle. Check the clamps for cleanliness and proper closure. Clean off any corrosion using a wire brush or baking soda solution. Make sure the clamps connect firmly to the vehicle’s battery terminals. Poor contact will keep the jump starter from working. Ensure a good connection for successful use. Proper maintenance of the clamps is essential.
- Inspect the Clamps: Check for damage or corrosion.
- Clean the Clamps: Remove any dirt or corrosion for better contact.
- Secure Connection: Make sure the clamps are making a firm connection.
- Test the Connection: Try connecting to another battery to test the connection.
Jump Starter Not Turning On
If the jump starter won’t turn on, there could be a few issues. Check the power button and the internal fuses. Make sure the device is fully charged. Inspect the charging port and cables for damage. If all of these things check out, the issue might be internal. If it does not turn on, you might need professional help. Knowing what to do in this situation can make a difference. Always take the jump starter to a professional for internal issues.
- Check Power Button: Make sure the power button is working.
- Examine Internal Fuses: Inspect the fuses for any signs of damage.
- Check Charging: Make sure the jump starter is fully charged.
- Seek Professional Help: If the jump starter still will not turn on, it may need to be repaired.
Frequently Asked Questions
Question: How often should I recharge my jump starter during winter storage?
Answer: Recharge your jump starter every 1-3 months, even when it’s not in use, to maintain battery health.
Question: Can I store my jump starter in my car during winter?
Answer: It’s generally better to store your jump starter in a temperature-controlled environment, such as a garage or basement, rather than in your car where temperatures can fluctuate drastically.
Question: What’s the best way to clean the clamps on my jump starter?
Answer: Use a wire brush or a solution of baking soda and water to remove any corrosion or dirt from the clamps.
Question: What should I do if my jump starter doesn’t turn on after winter storage?
Answer: Check the power button, fuses, and charging port. If the problem persists, it may need to be repaired professionally.
Question: Is it okay to use my jump starter in very cold temperatures?
Answer: Yes, you can use your jump starter in cold temperatures, but its performance may be slightly reduced. It’s best to store it in a cool place rather than the cold for maximum performance.
Final Thoughts
Keeping your jump starter ready for winter is easy with the right knowledge. Proper storage includes cleaning, charging, and choosing the right location. You’ve learned about the key things to consider when you how to store jump starter in winter, so it’s ready when you need it. Remember to regularly check the battery and inspect all the parts. By avoiding common storage mistakes, your device will last longer. Following these simple steps will give you peace of mind. Now, you’re prepared to face winter with confidence.