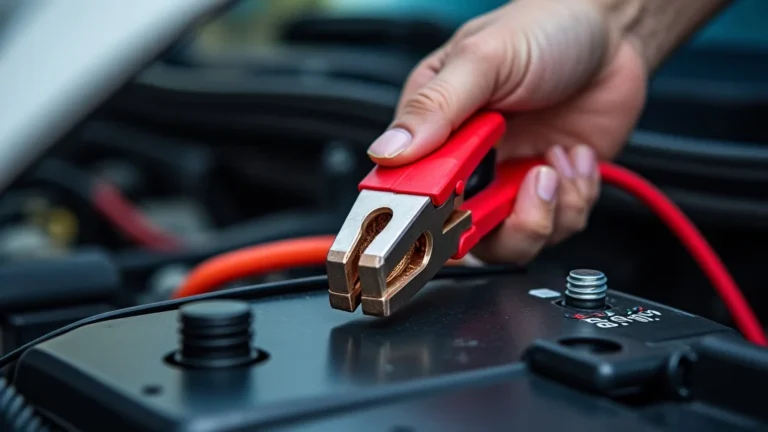
Jump Starter Charging Light Blinking Explained for Beginners
Having a jump starter charging light blinking can feel confusing, especially if you’re new to these handy tools. It’s a common issue, and the blinking light often means something simple needs your attention. Don’t worry, though; this isn’t a sign that your jump starter is broken. We’ll explore why that light blinks and give you a straightforward, step-by-step guide to get your jump starter working properly. Prepare to get your jump starter charged quickly!
Why Your Jump Starter Charging Light Blinks
When the charging light on your jump starter starts blinking, it’s the device’s way of telling you something. It could be that the unit is not getting enough power, or there might be an issue with the battery itself. Other issues can be related to the charger or the environment. It is important to explore the potential causes, so you know how to proceed.
Common Causes of a Blinking Light
Several factors can cause the charging light on your jump starter to blink. The most frequent issues relate to power source problems, the device’s internal battery, or the charger itself. Examining these areas can help you troubleshoot the problem and get the device working as designed.
- Low Voltage Input: Your jump starter might be connected to a power source with insufficient voltage. This often happens if the outlet or the extension cord is faulty. Always ensure that the power supply meets the device’s specifications.
- Overheating: If the jump starter or the charger gets too hot, the charging cycle might be interrupted, and the light may blink to indicate this.
- Faulty Charger: The charger could be the source of the problem. A damaged or malfunctioning charger won’t correctly supply power to the jump starter, causing the light to blink.
- Battery Issues: The internal battery in your jump starter may be at fault. This could mean it is overcharged, damaged, or simply old.
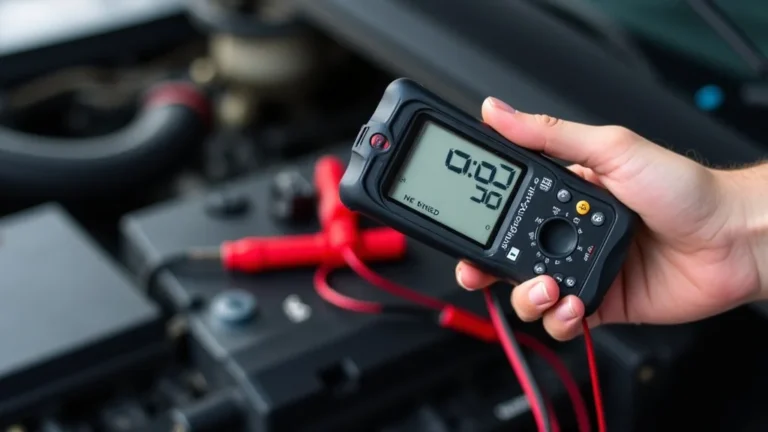
A low voltage supply means that the device isn’t getting the required power, and this can cause the charging light to blink. Check the specifications for your jump starter to confirm the correct voltage, usually printed on the charger or the device itself. A multimeter can measure the output voltage of your power outlet. If the voltage is too low, try another outlet, power strip, or a different extension cord.
Overheating can occur if the device is in a warm area, is left charging for too long, or has internal issues. Allow the jump starter and charger to cool down before trying again. Place the device in a cool area and give it time to cool down completely. Forcing a charge when hot can damage the device.
The charger is the interface between your jump starter and the power source. If it is damaged or fails, it might not provide the appropriate power or might have internal problems. Try using a different charger if possible. If the problem persists with a different charger, the issue is likely with the jump starter itself. Always use the charger that came with the device, or one that has similar specifications.
The battery is the heart of the jump starter. Overcharging, age, or damage can significantly affect its function. The blinking light can also indicate an overcharge protection trigger. Check the battery condition and the device’s age. If the battery is old or appears damaged (swollen or leaking), consider replacing the jump starter.
Step-by-Step Guide to Fix a Jump Starter Charging Light Blinking
If you have a jump starter charging light blinking, there are several steps you can take to diagnose and solve the problem. This guide will provide clear instructions and things to try to get your device back in shape.
Inspection and Preliminary Checks
The first step in resolving the issue is a thorough inspection of both the jump starter and its charger. Checking for physical damage, ensuring proper connections, and assessing the power source are essential steps before attempting any repairs. Let’s dig deeper into the necessary preparatory checks.
- Visual Inspection: Examine the jump starter and charger for any visible damage.
- Check Connections: Make sure the charger is properly connected to both the jump starter and the power outlet.
- Verify the Power Source: Ensure the power outlet is working.
Carefully look at the charger and the jump starter. Check for cracks, loose wires, or any signs of physical damage. Loose connections or damage can disrupt the charging process. If the cord is frayed or damaged, replace it immediately, as it may be a hazard. Also, check the ports for debris or corrosion.
A loose connection can often be the culprit. Ensure the charger cable is firmly plugged into both the jump starter and the outlet. If using an extension cord, make sure it is securely plugged into the wall and the charger. Wiggle the connections to see if the blinking stops. If this fixes the issue, your connections were probably the problem.
Test the outlet with another device to ensure it provides power. If the outlet is not working, try a different one. The problem might be a tripped circuit breaker or a faulty outlet. If other devices work in the same outlet, proceed to the next step. If not, reset the circuit breaker or use another outlet.
Advanced Troubleshooting Steps
If the initial checks don’t fix the blinking light, there are other methods you can use. These include trying different charging methods, resetting the device, and testing the battery’s condition. This section will guide you through these additional troubleshooting techniques.
- Try a Different Outlet: If possible, plug the charger into a different outlet to rule out any issues with the power source.
- Check for the Correct Charger: Make sure you are using the correct charger for your jump starter.
- Battery Test: Check the jump starter’s internal battery using a multimeter to measure the voltage (If you know how and you have a multimeter).
Sometimes, outlets can be the source of problems. They may have low voltage or be partially damaged. Moving to a different outlet is an easy troubleshooting step. If the charging light stops blinking in a different outlet, the original outlet was likely the problem. Consider checking the original outlet with a voltage tester.
Using the wrong charger can cause charging problems. Jump starters come with chargers, which are rated for a specific output. A charger with a different voltage or amperage can cause the light to blink. Find the original charger, or confirm the specifications match the original charger. Refer to the manual for specifics.
This is where you determine whether the battery inside is dead or damaged. Set the multimeter to DC voltage, then touch the probes to the battery terminals. If the voltage is too low, the battery may need
Example Scenarios and Solutions
Practical examples can provide a better picture. Here are a couple of scenarios to explore where jump starters are at play and how to resolve common problems. These examples will show you the problem and explain the solution.
- Scenario 1: The Weak Power Outlet.
Sarah was trying to charge her jump starter, but the charging light kept blinking. She checked the device and charger, and everything looked fine. She tried multiple times to charge, but the light continued to blink. She then tested the outlet and realized it was providing lower voltage than needed. Switching to another outlet fixed the issue, and the jump starter began to charge normally.
- Scenario 2: Damaged Charger.
John’s jump starter charging light blinked continuously. He examined the charger and found that the cable was frayed near the connector. Knowing this might be the problem, he
Delving into Battery Management for Your Jump Starter
Caring for your jump starter’s battery involves regular maintenance and following the manufacturer’s recommendations. Battery life and performance directly impact the functionality of your jump starter. Let’s explore essential practices to keep your device in top condition.
Battery Types and Their Characteristics
Various battery types power jump starters, each with specific features. Common battery types are lithium-ion and lead-acid, with unique charging characteristics. It’s crucial to understand these to maintain your jump starter effectively. The choice of battery influences performance, lifespan, and care practices.
- Lithium-Ion Batteries: These are lightweight, powerful, and common.
- Lead-Acid Batteries: This traditional battery type is very reliable.
- Battery Management Systems (BMS): These protect the battery.
Lithium-ion batteries have a high energy density, allowing them to deliver more power in a smaller package. They also have a low self-discharge rate. However, they are sensitive to extreme temperatures. It’s important to charge them appropriately. Overcharging or deep discharging can damage lithium-ion batteries and shorten their lifespan. Always follow the manufacturer’s guidelines.
Lead-acid batteries are durable and can withstand more rigorous use. They are generally less expensive than lithium-ion batteries. However, they are heavier. They also discharge faster when not in use. They need to be charged more frequently to maintain optimal performance. Regular maintenance is essential to avoid sulfation, a common issue with lead-acid batteries. The most important thing is to keep the lead-acid batteries fully charged and to avoid complete discharge.
BMS are integrated in most modern jump starters, particularly those with lithium-ion batteries. The BMS monitors and protects the battery from overcharging, over-discharging, and overheating. This extends the battery’s lifespan and ensures safety. A BMS prevents the jump starter from being damaged and helps to optimize charging and discharging cycles.
Charging and Maintenance Tips
Correct charging techniques and routine maintenance are crucial for maximizing your jump starter’s lifespan. Following these guidelines helps ensure your device remains ready when you need it.
- Regular Charging: Charge the jump starter regularly, even if it’s not used.
- Avoid Extreme Temperatures: Keep the jump starter away from direct sunlight, extreme heat, and freezing temperatures.
- Proper Storage: Store the jump starter in a cool, dry place when not in use.
- Follow Manufacturer’s Instructions: Always follow the specific charging and maintenance instructions provided in the jump starter’s manual.
Frequent charging keeps the battery in optimal condition. Check the device’s charge level every few months, and recharge it as needed. Storing your jump starter at full charge is better than letting it sit discharged. This prevents the battery from completely draining and possibly damaging the cells. This practice extends the lifespan of the battery and keeps it ready for action.
Extreme temperatures can degrade battery performance and reduce its lifespan. Store the jump starter in a moderate-temperature environment. High temperatures can cause the battery to degrade quickly. Low temperatures can reduce the battery’s capacity and make charging difficult. Keep your device in a garage, closet, or your car’s trunk.
Proper storage is essential for maintaining battery health. A cool, dry location will help prevent battery degradation and corrosion. Avoid areas with high humidity. Make sure the storage area is free of moisture. This extends the lifespan of the device. It keeps the jump starter ready to use at all times.
The manual provides the most accurate and safe way to charge and maintain your jump starter. Check the manual regularly for updates. If you lost the manual, you can search online for it. Each device has specific requirements based on the battery type and design of the jump starter. Following the manufacturer’s guidelines will maximize the device’s life.
More Problems and Solutions: The Charger Itself
The charger is a vital piece of equipment, and it’s essential to understand its role. Understanding its potential issues is key to keeping your jump starter in working order. Here’s a detailed exploration of charger-related challenges and their resolutions.
Charger Malfunctions and Their Causes
The charger can experience various problems, from internal component failures to external damage. Troubleshooting charger malfunctions involves understanding the most common causes and the effect those issues have on the charging process.
- Internal Component Failure: The charger’s internal components, such as diodes and capacitors, can fail over time.
- Overheating: The charger can overheat.
- Damage from Power Surges: Power surges can damage the charger’s components.
- Physical Damage: Physical damage, such as a damaged cable or port, is a common issue.
These components are susceptible to wear and tear due to voltage fluctuations, heat, and age. This can lead to the charger delivering an incorrect voltage or current, resulting in the charging light blinking. If the charger is old, it might be time to replace it. A professional can diagnose and replace faulty components. However, this may not be cost-effective.
Charging devices for too long or in warm environments can cause the charger to overheat. Overheating can lead to internal damage. To prevent this, always charge your device in a cool, well-ventilated area. If the charger feels hot to the touch, unplug it and allow it to cool down before trying again.
Power surges can occur during thunderstorms or due to electrical grid problems. These surges can overload the charger’s delicate circuits, leading to failure. Using a surge protector can help protect the charger from such incidents. If the charger is exposed to a power surge, it should be examined by a professional or replaced.
Physical damage can disrupt the charging process. If the cable is frayed, or the ports are damaged, the charger might not function correctly. Inspect the charger regularly. Replace the charger if any damage is noticed.
Troubleshooting the Charger
Troubleshooting your charger can often resolve the jump starter charging light blinking problem. These steps will guide you through the process, helping you identify and fix the issue.
- Check the Cable and Connector: Inspect the charging cable and the connector for any damage.
- Test the Charger’s Output: Use a multimeter to measure the charger’s output voltage and current.
- Try a Different Outlet: Plugging the charger into a different outlet is a basic yet crucial step.
- Replace the Charger: If the charger is damaged beyond repair, replacing it is the best solution.
Frayed or broken cables and loose connectors can stop the flow of electricity. Look for any visible damage like cuts or wear. Also, ensure the connector fits securely into the jump starter and the outlet. If you see any damage, the cable or connector needs replacement. Replacement cables and connectors are readily available at electronic stores or online.
Using a multimeter to check the charger’s output can reveal whether it is working correctly. Compare the readings to the specifications on the charger label. If the output voltage or current does not meet the specified values, the charger is faulty and needs replacement. This ensures your device gets the proper electrical charge.
Different outlets can provide different levels of power. If the light blinks, try a different outlet to ensure that the issue is with the outlet. If the new outlet works, the old one may not be providing enough power. It’s a simple test that can quickly help you diagnose the issue.
When the charger is faulty, replacing it ensures that your jump starter charges properly. Purchase a replacement charger that matches the specifications of the original. This is the simplest way to fix the problem when the charger is the root cause. This will ensure your device charges correctly and safely.
Frequently Asked Questions
Question: Why is my jump starter’s light blinking?
Answer: The most common reasons are a low power supply, overheating, a faulty charger, or an internal battery issue.
Question: How can I tell if the charger is bad?
Answer: Check the charger for physical damage, test its output with a multimeter, or try a different charger.
Question: What should I do if my jump starter won’t charge?
Answer: Check the power source, the charger, and the jump starter itself. Follow the troubleshooting steps.
Question: Can I use a different charger for my jump starter?
Answer: You can use a different charger, but it must have the same voltage and amperage specifications as the original.
Question: How often should I charge my jump starter?
Answer: It’s best to charge it regularly, every few months, even if you don’t use it, to maintain its battery health.
Final Thoughts
If your jump starter charging light blinking, don’t worry. This issue is usually easy to resolve with a little investigation. Check the power source, examine the charger, and make sure the connections are secure. Also, be sure to inspect the jump starter and its battery. By following the steps provided, you should be able to identify the problem and get your jump starter working again. Remember to keep it in a safe, cool, and dry place. With a bit of care, your jump starter will be ready to help when you need it.